Map Group
A map group is a way to organize maps into folders. This helps you keep your maps organized and makes it easier to find the maps you need. You can create a new map group and add maps to it as needed. You can also edit or delete map groups as needed.
Create a Group
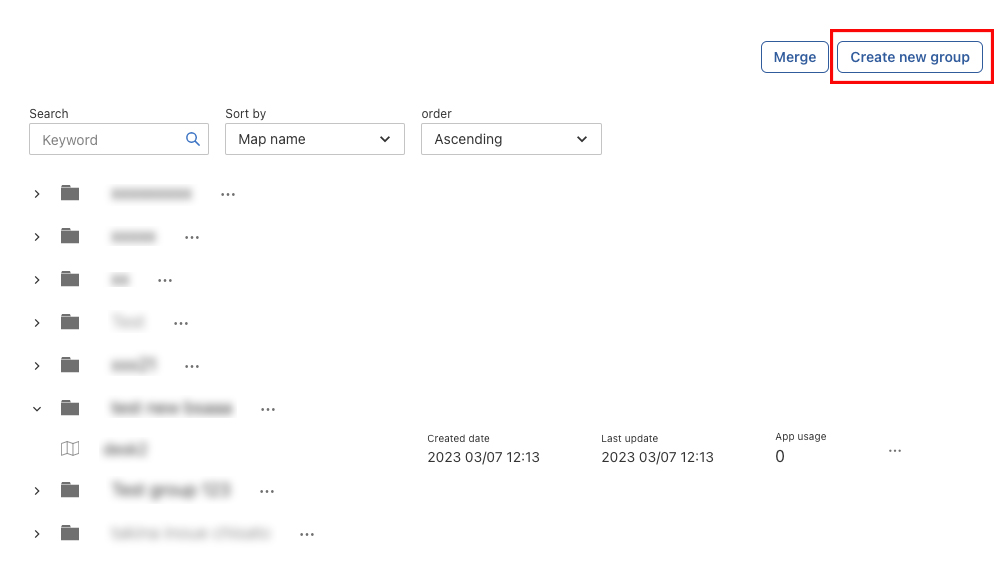
- Once you’re on the Map manager page, located on the top right of the page, there is a "Create map group" button.
- Click on the button, and the map group creation modal will appear. Fill in the required fields, and press the create button to create the new map group in your team.

- From now on, you should be able to see the newly created group inside your table.
Edit a Group
- To edit a group, visit the map manager page.
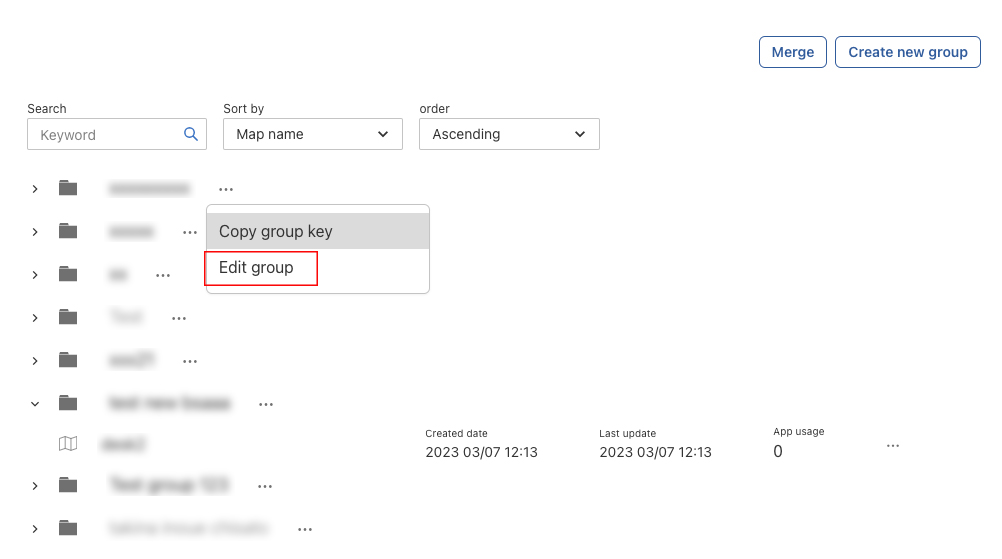
- Locate the target group, there will be a menu button that will show a menu for the group, such as "Edit group" and "Delete group".
- Click on "Edit group", and the modal will appear pre-filled with the selected group's name. Rename it as desired and click on "Save". The changes will be reflected immediately.

Delete a Group
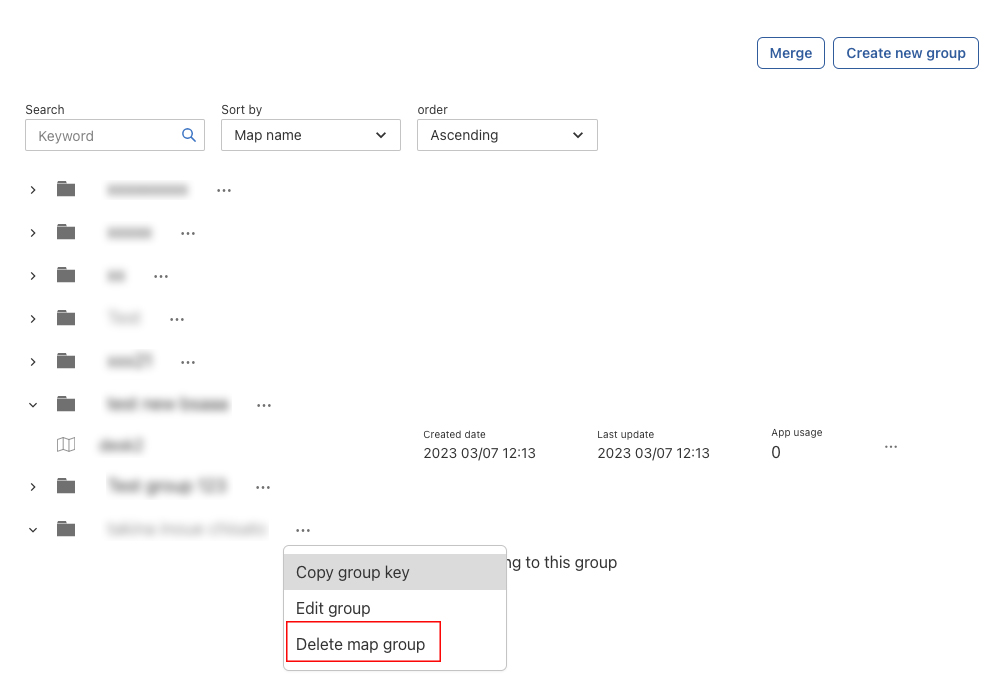
- To delete a group, follow the same steps as for editing a group.
- Click on "Delete group". Note that you can only delete a group that does not contain any maps.
- If the group contains maps, you must first delete the maps within the group before deleting the group itself.
- The confirmation modal will appear. Click on "Delete" to permanently delete the group.
