Application Management
Create application
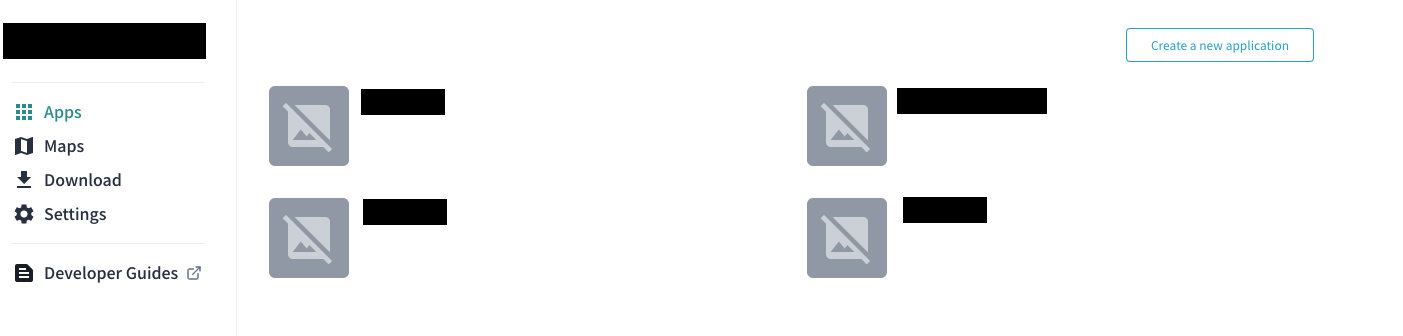
- Once you logged in to the Developer Console, you’re on the main page of your team which shows you all applications inside. From this page, you can create an application by click on the greenish button.
- Once the modal show up, fills in the required field and submit the form.
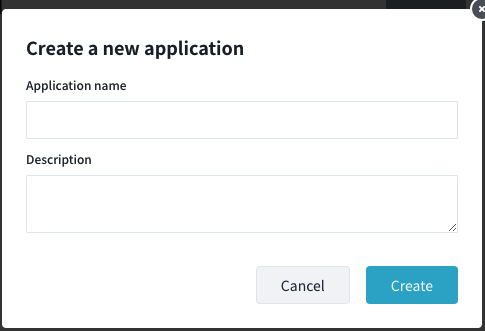
- After submitting the form, the newly created application should be displayed on the screen.
Viewing application detail
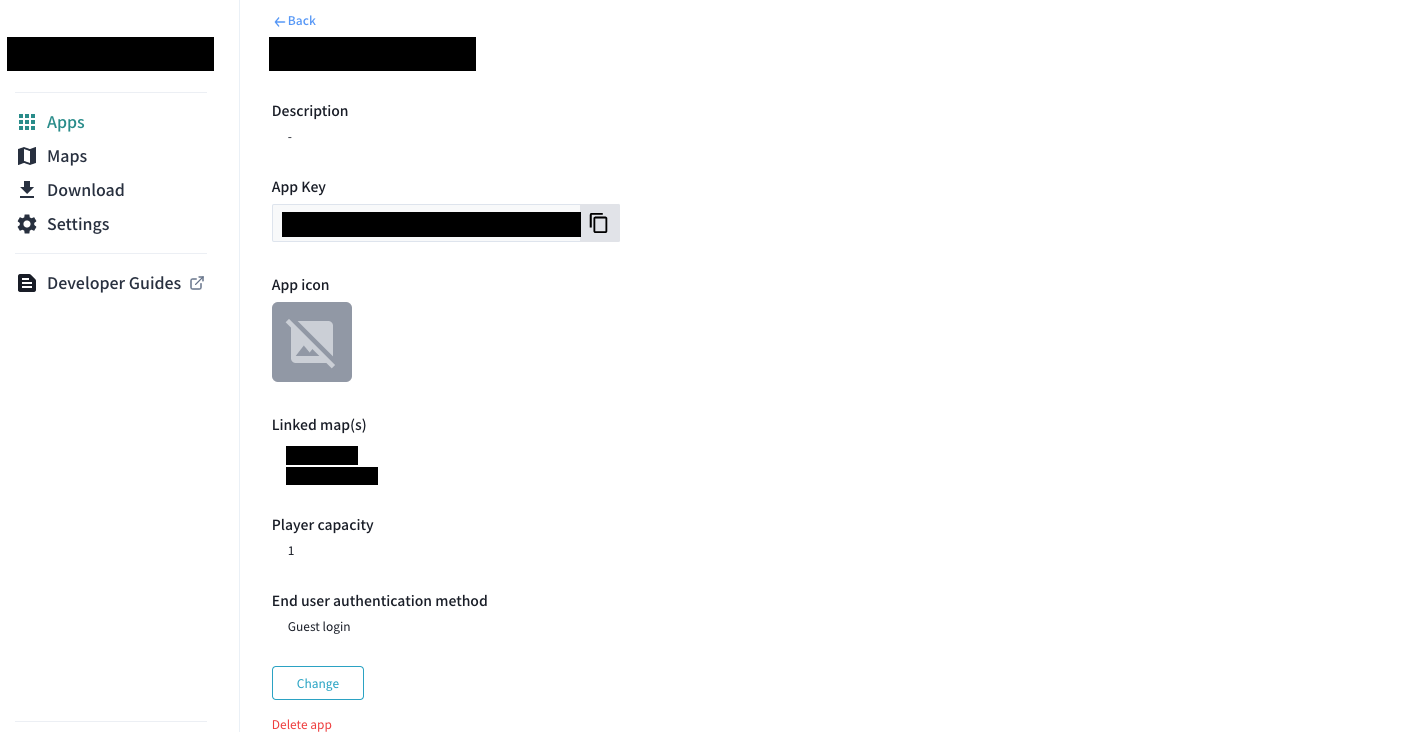
Clicking on the icon of the application will bring you to the Application Detail page, which allowed you to see more detail of the application.
Getting application key
- Visiting the application detail page.
- From here you can see the application key and the map that is accessible by this application.
Import map to the app
- Visit the detail page, from this page you will see the edit button. Clicking it brings you to the application setting page.
- From this page, you can update various things including the application’s name, the number of players supported, authentication method, and also the import map.
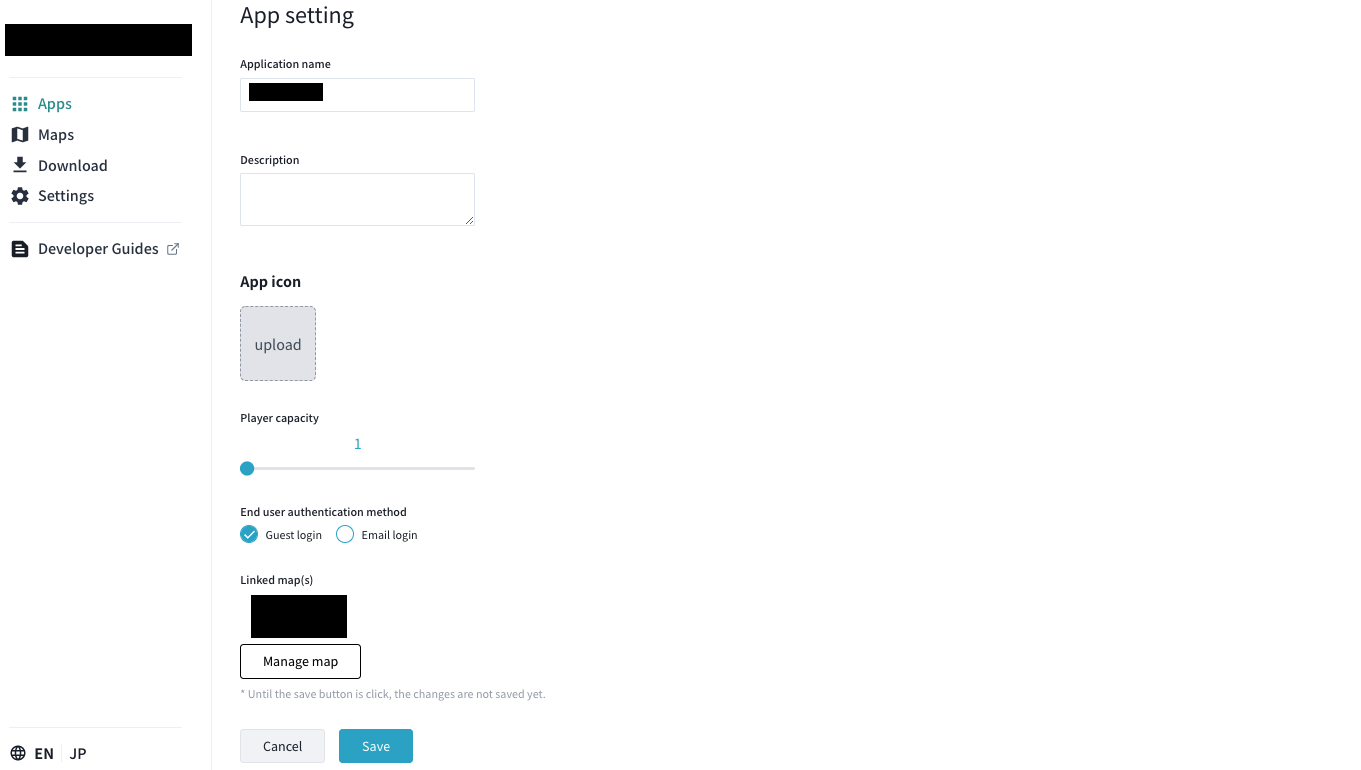
- To import the map, click on the manage map button. You’ll see the popup that showing the map listing table similar to the map manager page. The already selected map will be preselected, in case you want to remove it, feel free to unselect. Once the selection is done, you have to click on the Close button.
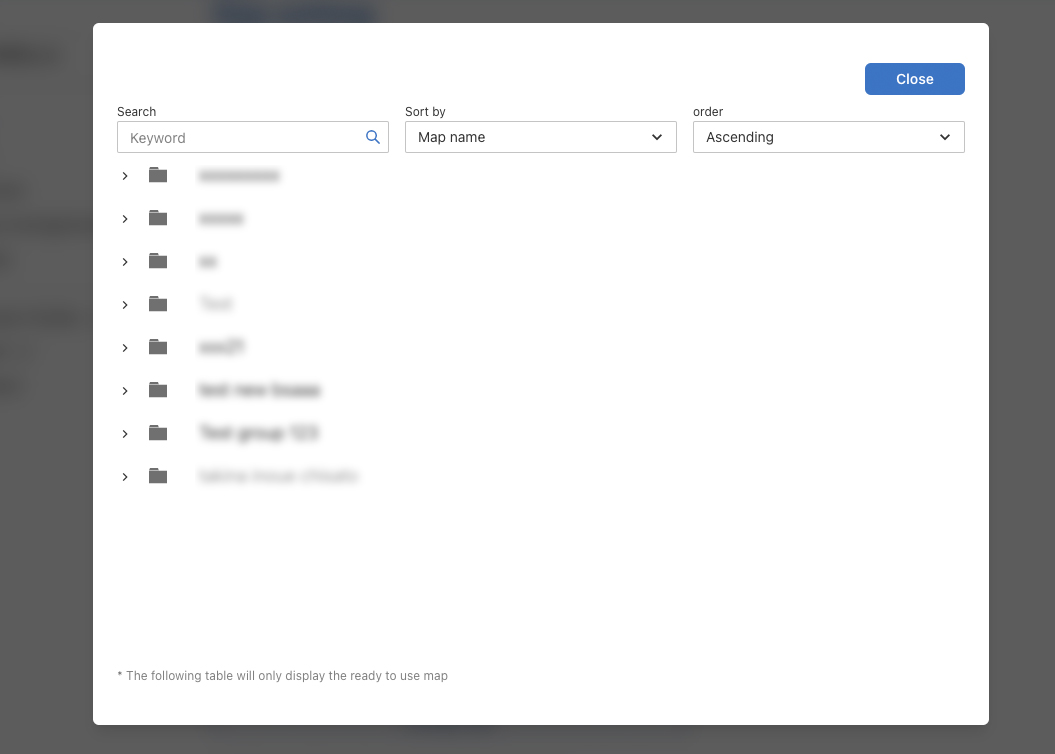
- The list of the selected maps will be displayed on this page. However, until you press the update button, the changes won’t reflect.
Delete application
- Visiting the application detail page, you’ll see the red text called “delete application“.
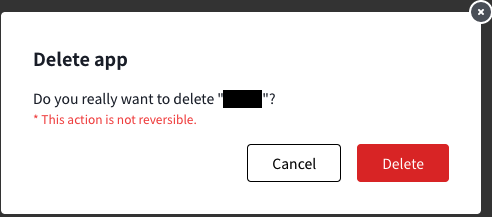
- Clicking on it, showing the confirmation modal, once you confirm the application will be permanently deleted and it cannot be recovered.