Custom Objects
This tutorial will walk you through the steps required to enable using custom objects when placing your content with 3D Scanner App.
Import Custom Objects Package
Custom Objects adds an additional dependency to Unity's Addressables system, which is why it is provided as an additional package rather than included in the Pretia SDK. The reason is because we want to keep the SDK relatively lean and focused on providing the core features of Pretia AR Cloud, which is relocalization and multiplayer.
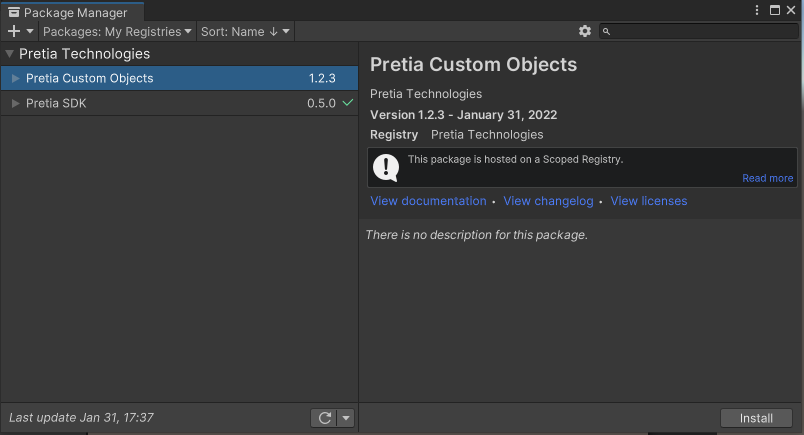
If you have followed the guide in Getting Started, then you should be able to find the package from Unity's Package Manager window. You can open it by selecting Window > Package Manager from the top menu bar. Select Pretia Custom Objects and press the Install button to import the package.
Adding Custom Objects
Pretia Custom Objects is built on top of Unity's Addressables. After finishing the import process, notice that the Addressables package has been installed as a dependency, and you can find a new empty directory with this path Assets/Pretia/PretiaCustomObjects.
Note: If for any reason you don't find this directory, please retry the setup process by selecting
Pretia > Custom Objects > Setup Custom Objectsfrom the top menu bar.

In order to add a custom object, you need to create a prefab and put it inside the PretiaCustomObjects directory. You can add some of Unity's default components inside the prefab, but you cannot add any custom scripts to it, otherwise you will not be able to build the custom objects. Here is the list of currently supported Unity default components:
- Meshes
- Particle System
- Animation
Note: It is important that the object has a
.prefabextension file.
Build and Upload Custom Objects
Finally, you can build and upload your custom objects. Before you do this, make sure that you have assigned an App Key from the Sdk Setup window, and your account is logged in within Unity Editor. Once you are ready, you can select one of the options from Pretia > Custom Objects > Build and Upload. Custom objects are built as an asset bundle managed by Addressables, so it needs to be built for each platform of 3D Scanner App that you will use, as there are differences in the shader for each platform.
Currently 3D Scanner App only supports Android, so it is better to just build for Android platform.
After the custom objects are built, it will be uploaded to Pretia's cloud storage and can be used from 3D Scanner App of the built target platform. These custom objects are linked to the App Key that you have assigned in the Sdk Setup window. Whenever you want to update it, you can add some more objects to PretiaCustomObjects directory and run this operation again.

Using Custom Objects
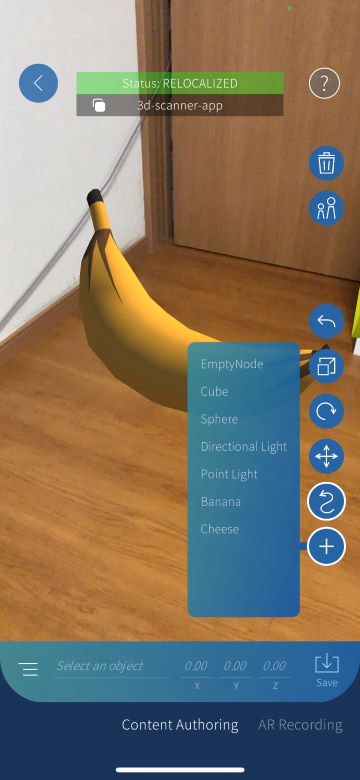
After uploading your custom objects successfully, you can use it from the Content Authoring feature in 3D Scanner App. Press the + button and scroll down to see your custom objects within the list. Select your custom object to add it as a map content. You can do all the editing operations explained in the previous tutorial the same way as Unity's default objects.
In the next step, we will download the map contents and import it to your Unity project.