Multi-Factor Authentication
Good practice for account protection
The Two-factor authentication is now supported on the Developer console website. There are two ways to set this up for your own account or your team, once you enable 2FA for your account, the next time you attempt to log in through the Developer Console or 3D Scanner App, you will receive a one-time password via email. This password is valid for a limited time and must be entered in the prompt when logging in order to successfully access your account.
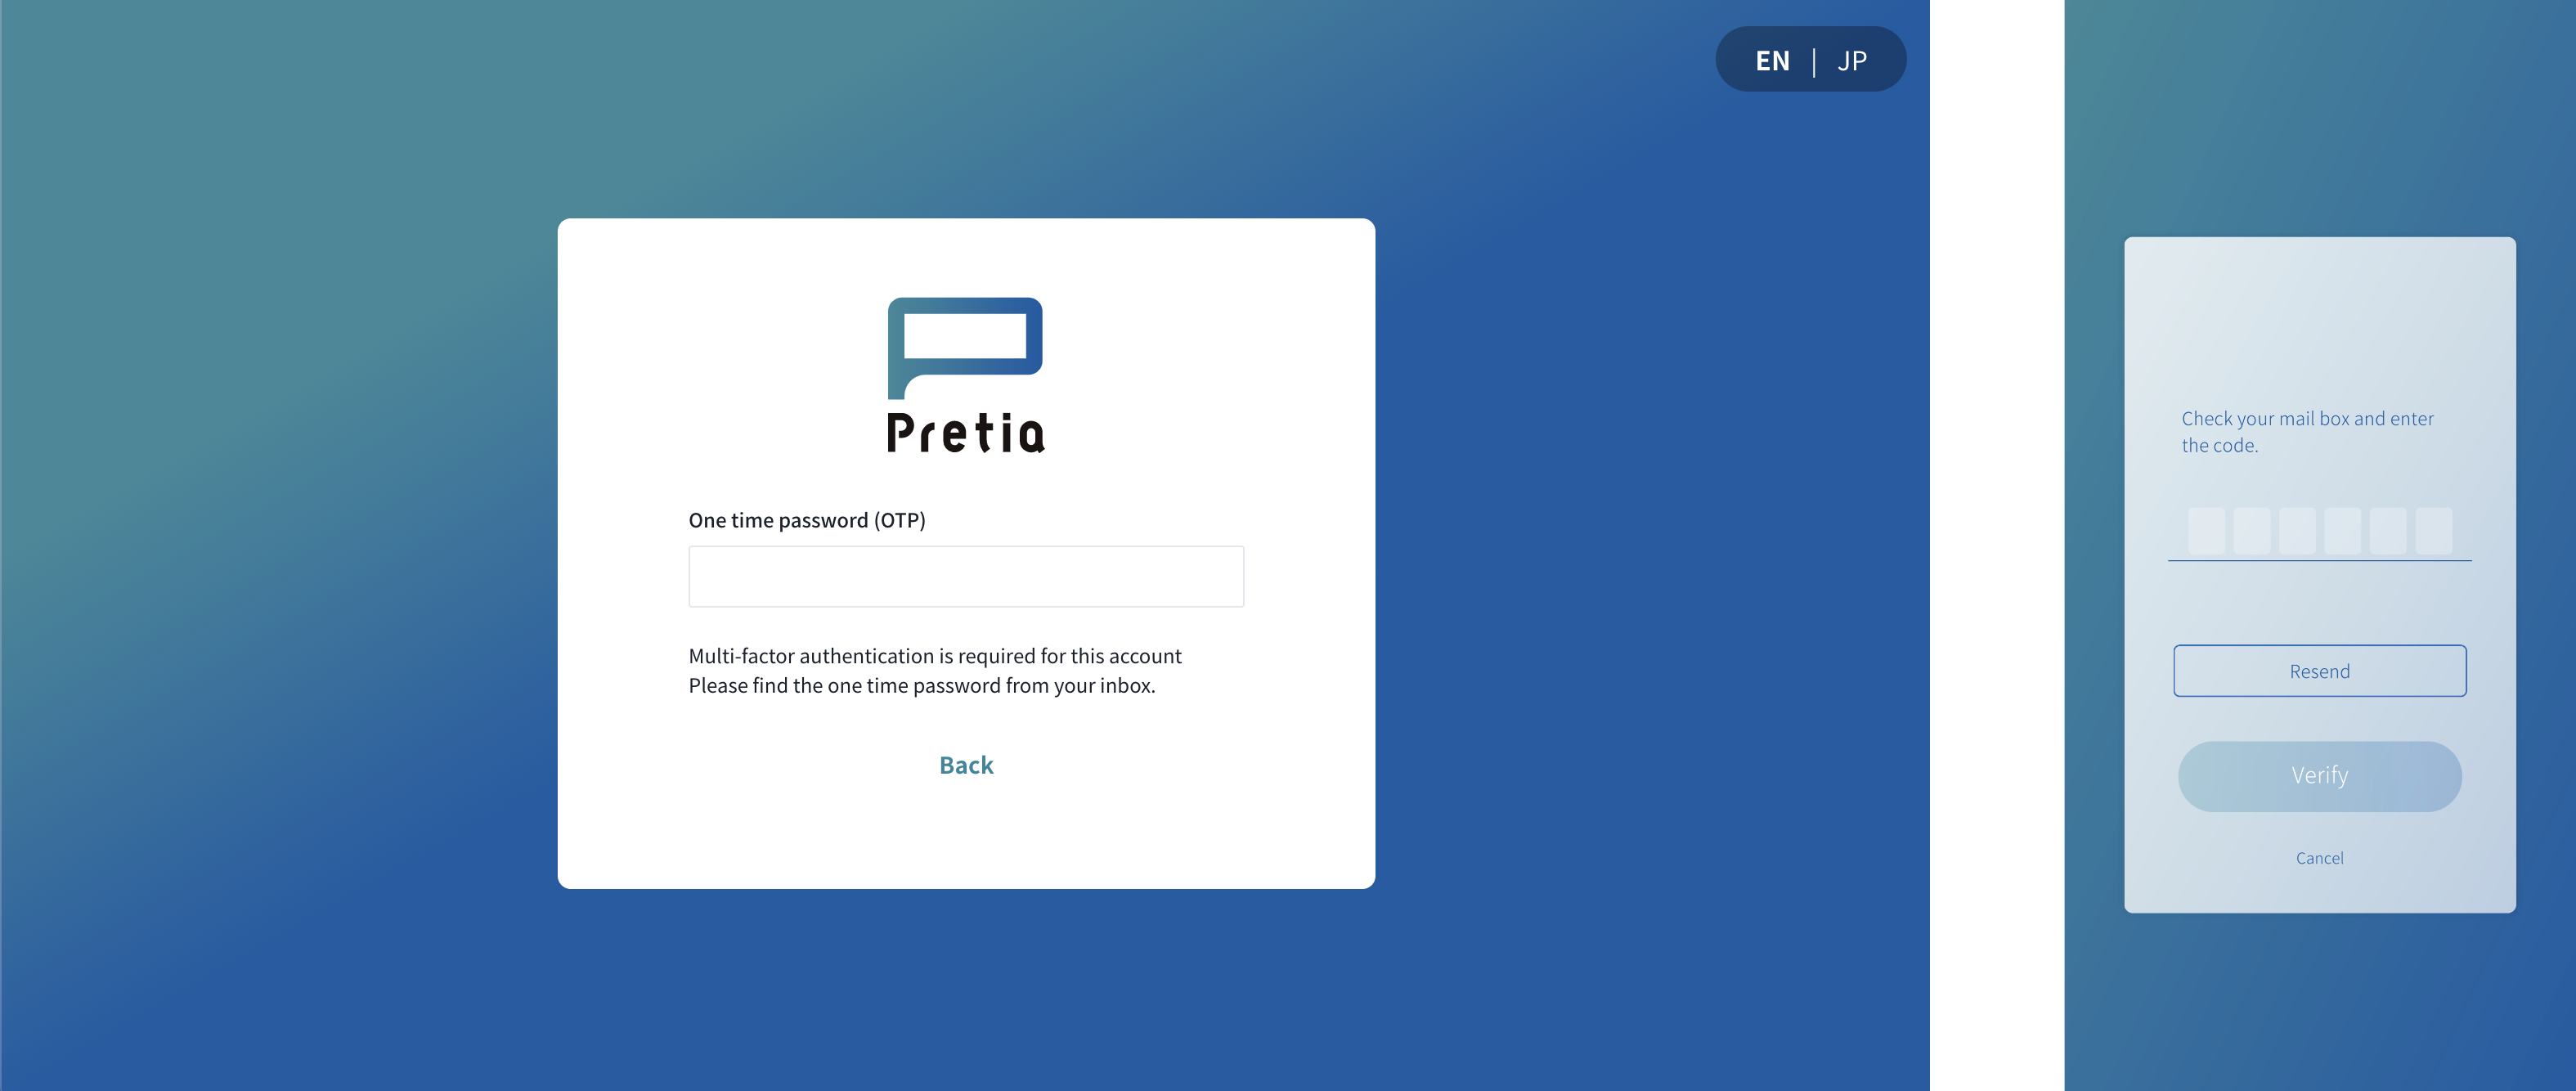
It is important to note that this added security measure is designed to protect your account from unauthorized access and should be treated with the utmost care. Do not share your one-time password with anyone and make sure to check your email regularly to ensure you have access to the password when needed.
For your own account
To turn on multi-factor authentication for your own account, this can be done from the developer setting page. You will need to follow only a few steps to archive it.
- Visit the developer setting page, from the top right of the screen click on the profile icon.
- Go to "Account setting" from the menu shown there.
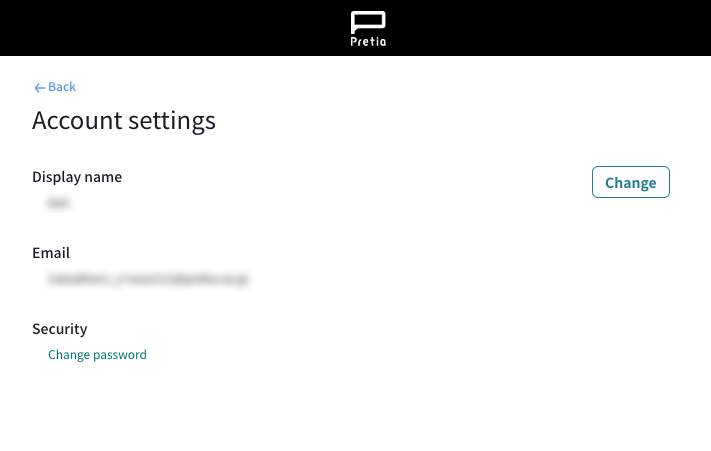
From account setting page, click on the "Multi-factor Authentication" menu.
The Multi-factor Authentication settings screen will show up.
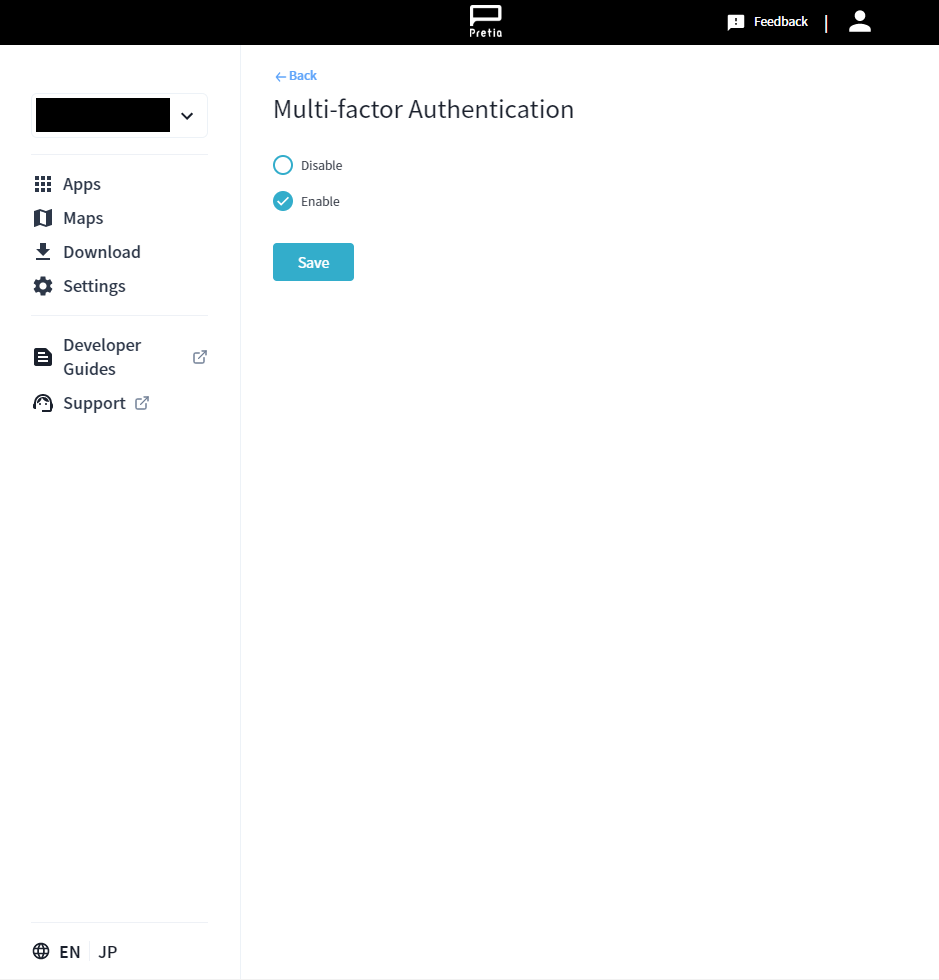
- Select "Enable" and press the "Save" button.
For the team (Recommended)
Turning on two-factor authentication for your team will enforced all members to have it enabled. To enable this setting, an admin of the team has to follow the following steps.
- Visit the setting page from the target team you would like to enable two-factor authentication.
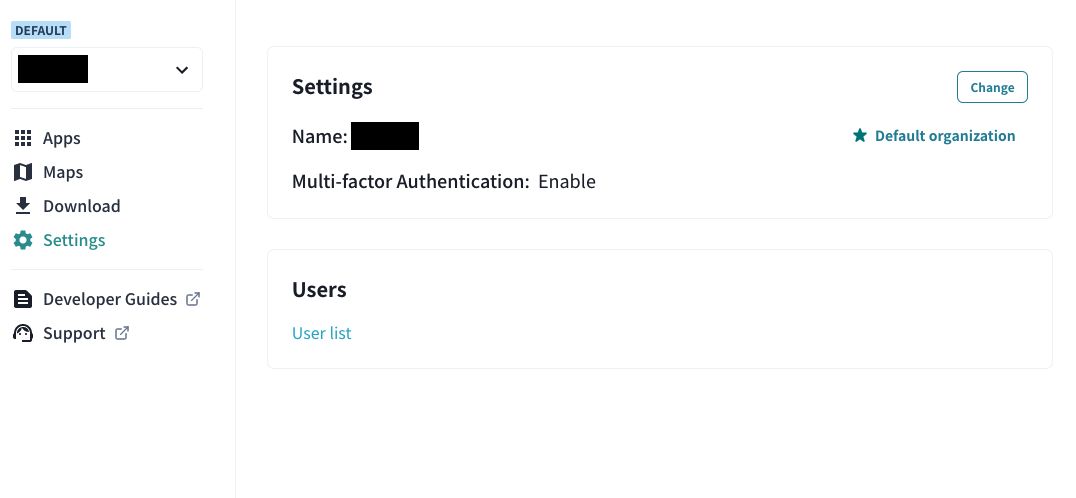
- From the setting page, click on the "Change" button.
- The team setting menu will be showing on the screen.
- Select the "Enable" option under two-factor authentication field.
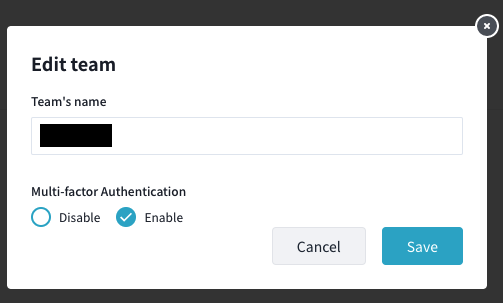
- Click on the "Save" button.