Introduction to Mapping
Environments
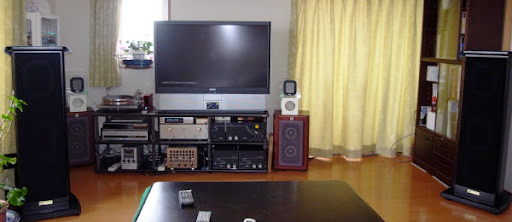
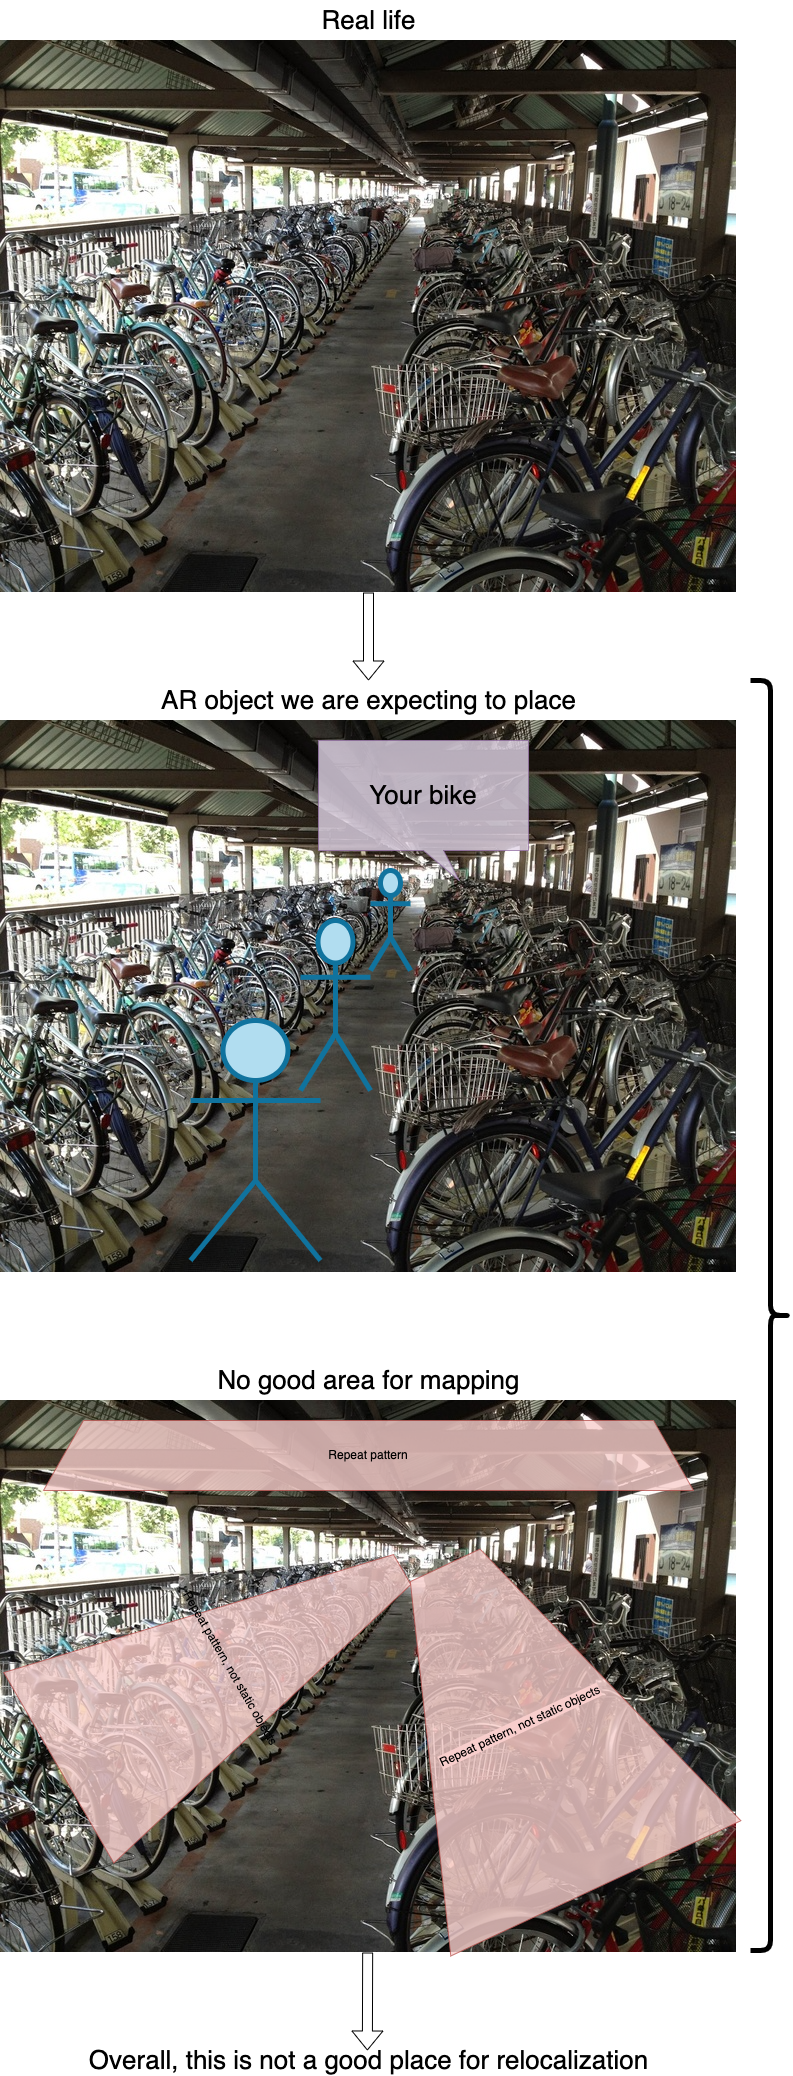
To create a good quality map, the first thing to do is to find a good environment to scan. Here, we don’t recommend picking a place in an open space, repeated pattern, or no significant features.
Example: Not supported
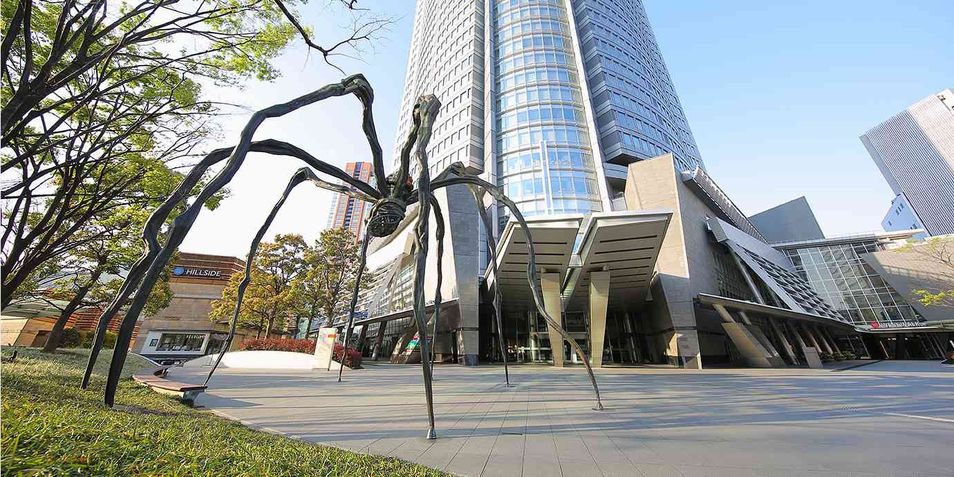
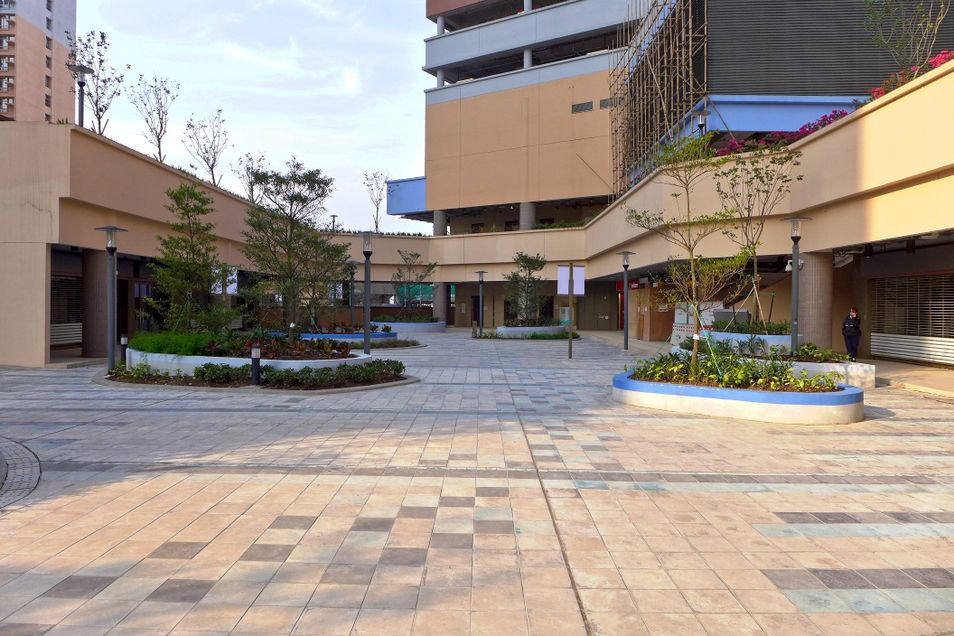
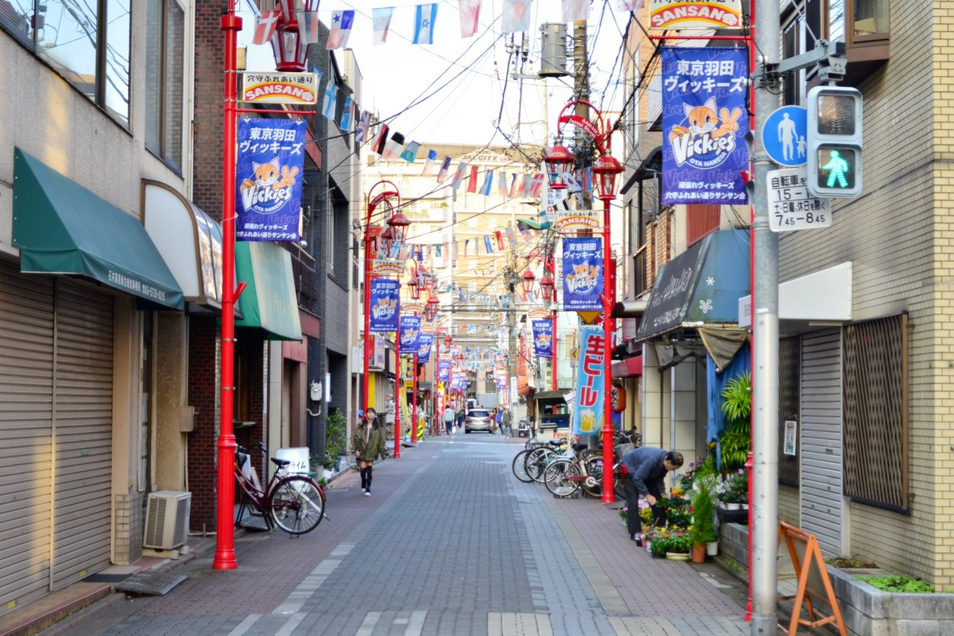
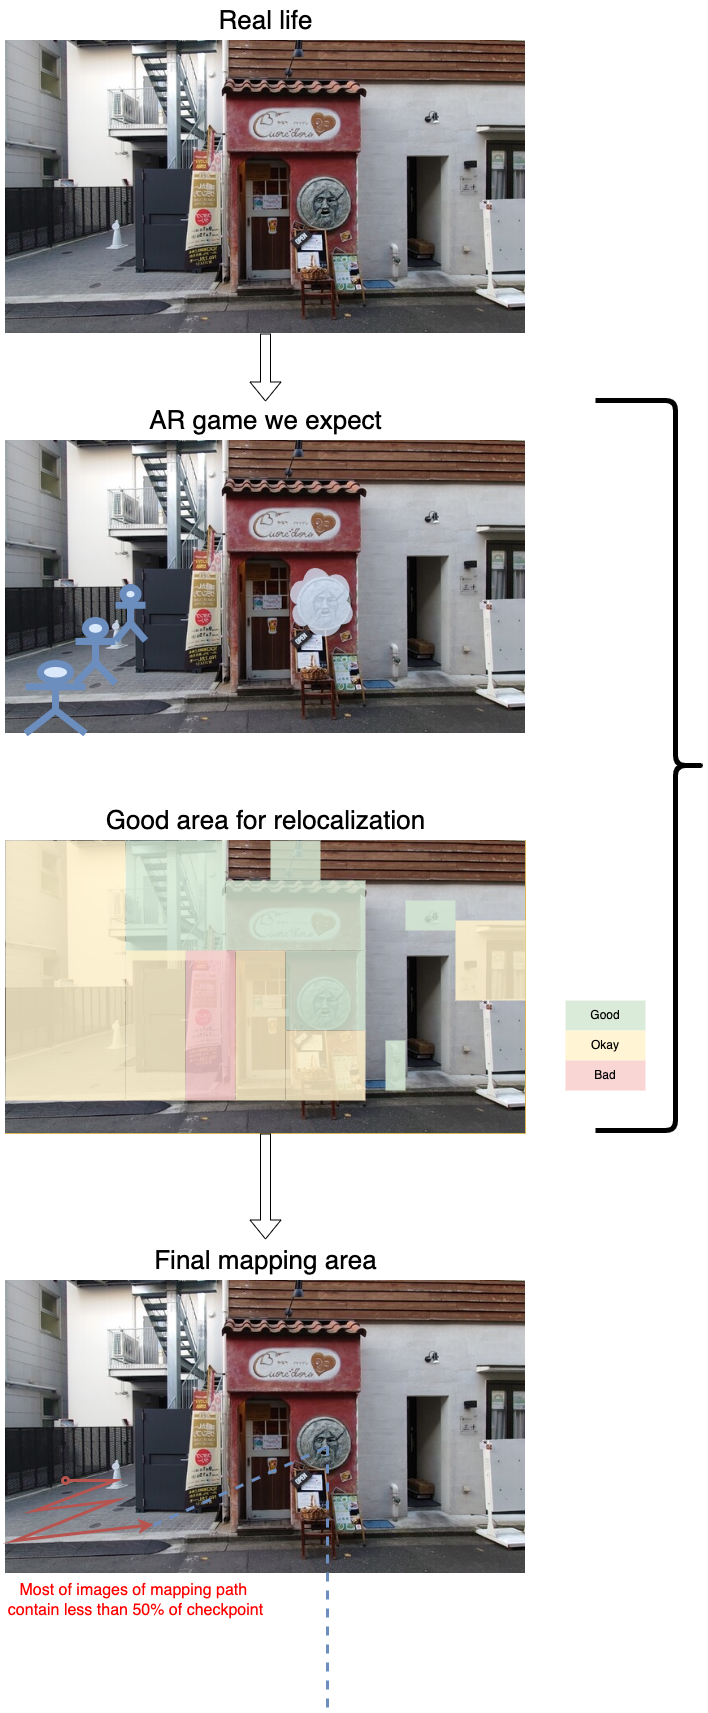
Therefore, the indoor environments and street view are most recommended
Example: Support
Checkpoints
A checkpoint would be a building or a location where you would like to create your AR experience around.
Good checkpoints
- 🙆♂️ Static objects
- 🙆♂️ Uniqueness, e.g. the building structure, patterns and silhouettes are not repetitive.
Bad checkpoints
- 🙅♂️ Moving objects, e.g. cars, people, plants, rivers any natural materials
- 🙅♂️ Reflecting materials
- 🙅♂️ Bad lighting conditions: low light, overexposure, light changes depend on time, shadows…etc.
- 🙅♂️ Bad textures, e.g. featureless, repeating patterns

Scanning
Always move your feet in every single step during the scan process
- Walk around the whole area you want to scan
- Walk around 0.2 ~ 0.5m per second, move the mobile carefully
Focusing on the Good environments (see the session above)
Scan static objects as possible you can, e.g. building, furniture, … etc
Considering all possible player poses, it will create a minimum required map size.
Make your route as a loop, that is, back to somewhere we have already visited before.
Play Zone
A “Play Zone“ is a dilated area of a mapping path
The mapping paths should cover all possible user's play area
- NOTE: Do NOT repeat the mapping paths when scanning a play zone
Make sure the checkpoint in the camera images of the mapping path are between 30% ~ 70%
Keep the size of the checkpoint in your phone screen is around 30% ~ 70%
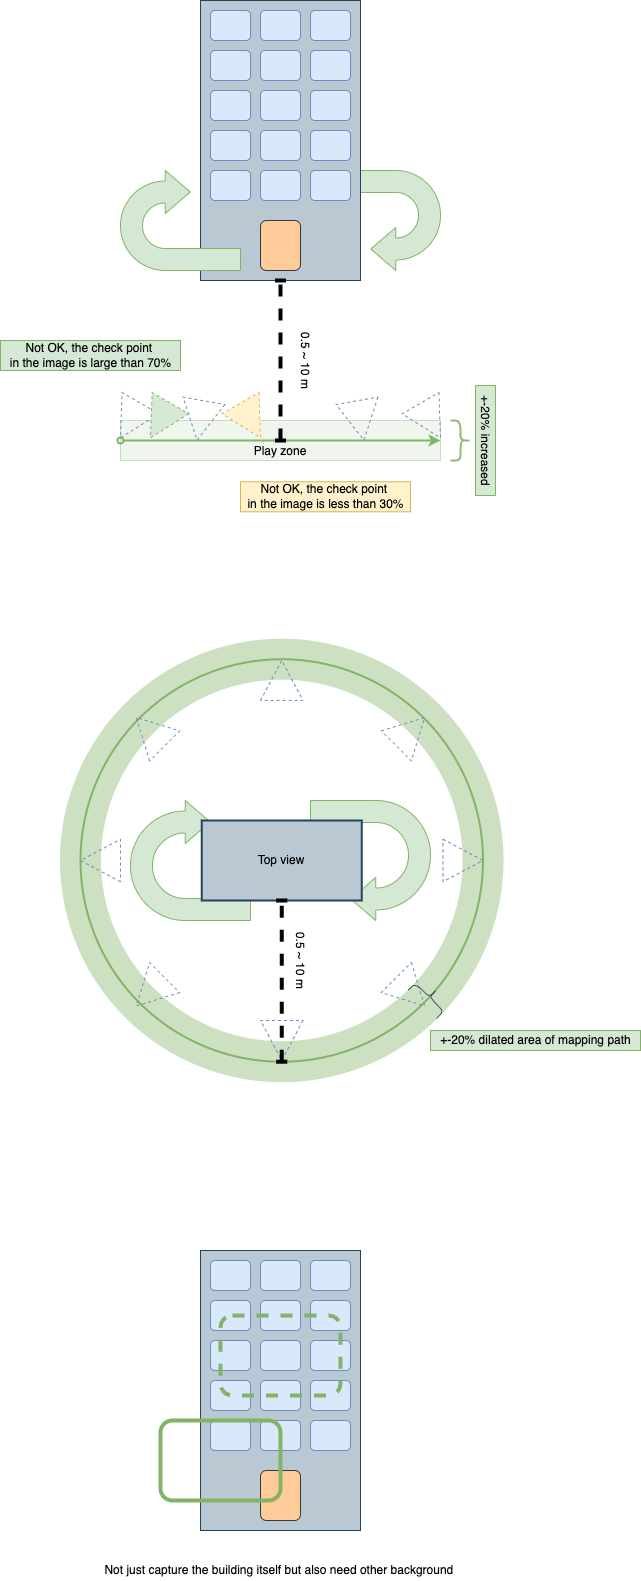
- When scanning, do not move perpendicular to the object, but rather parallel to it.
- If the play area or object is large, move the camera in a Z-like motion while moving your feet to scan the object.
- If you are setting up a play zone with depth, you can create a map that corresponds to depth by moving forward and backward in a diagonal motion instead of moving vertically.


Scanning Examples
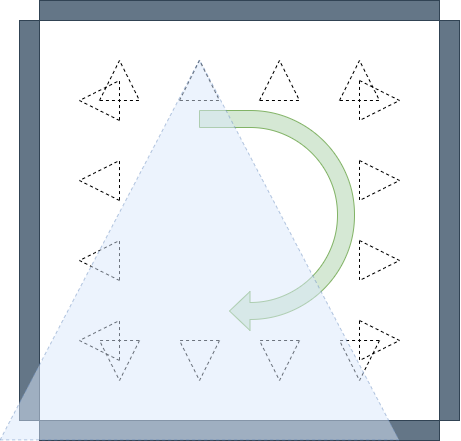
Indoor scenario, Regular room (e.g. 10 meters * 10 meters)
- Stand in a position where you can see an entire wall and move with the camera.
- Go around the room in a circle so that all four walls are scanned.
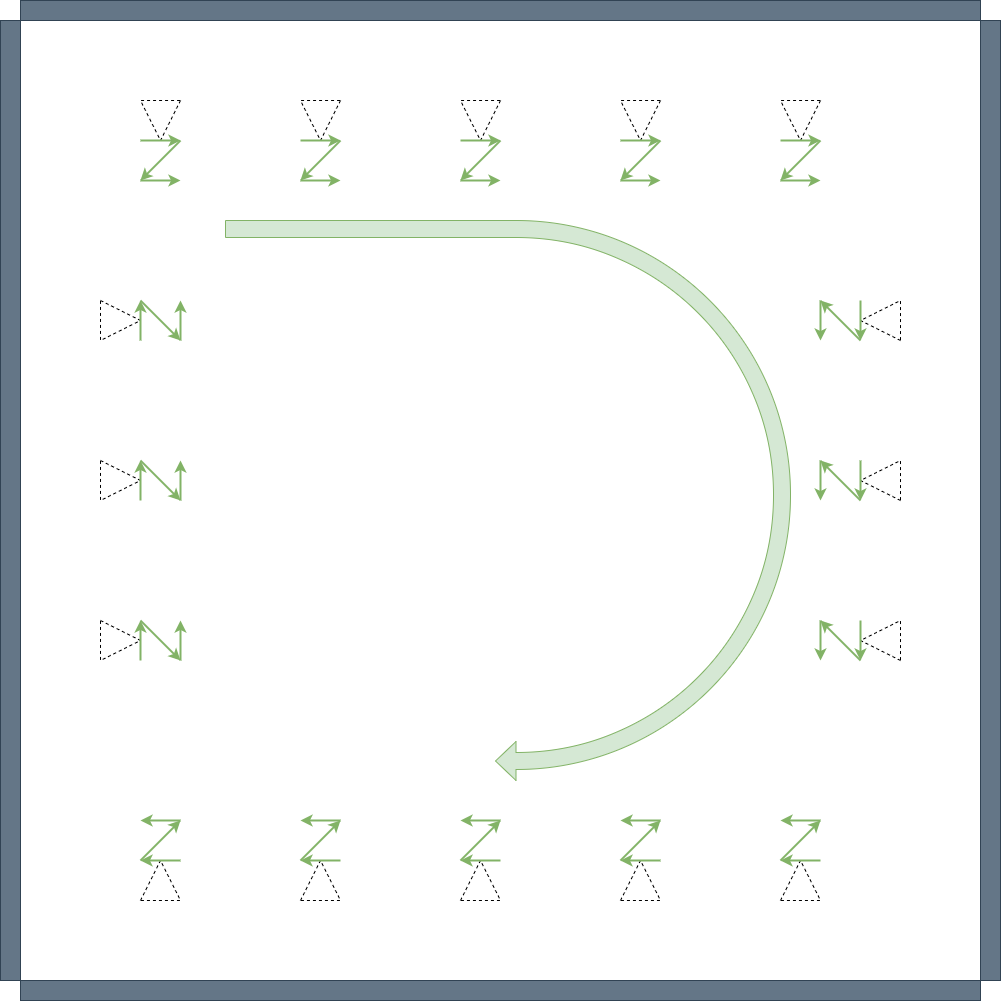
Indoor scenario, A huge hypermarket (e.g. 25 meters * 25 meters or larger)
- Divide one wall into several blocks and scan each block while moving in a Z-shape.
- After scanning one block, move to the scanning position while pointing the camera at the place to be scanned in the second block. Then scan in the same way, making a Z-shape. Repeat.
- There is no need to stop scanning when moving.
- Maintain a speed of 0.2 ~ 0.5 meters per second even when moving.
Outdoor scenario, City buildings
- Set the starting point at a distance of 0.5 ~ 10 meters from the target building.
- Move parallel while scanning on one side, then move diagonally to a position 1 meter behind the starting point, that is, move away from the building.
- Scan and move in parallel again.
- Move back 1 meter while moving diagonally again.
- Repeat until the play zone is covered.
- For a 360° scan of a building, statue, etc., perform the above movements in 45° increments, for a total of eight scans from eight different directions.

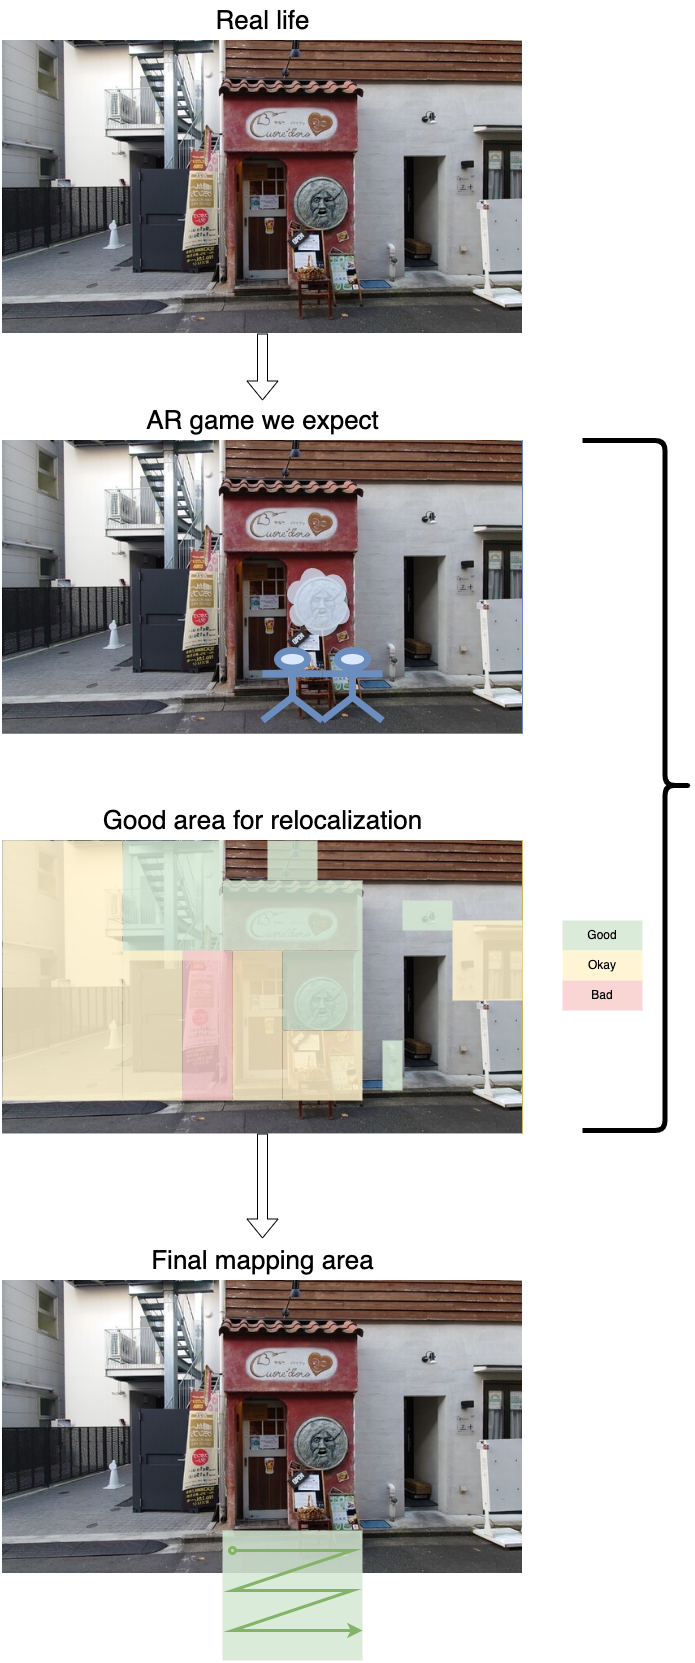
Relocalizing
- The scanning method is the same as mapping
- If the AR game is deliberately designed, the relocalization will always happen in the play zone.
Tips for Game Design - Put All Together
Sum up all concepts above, giving some tips for game design
- What is the best scanning strategy for your games
- Distance v.s. accuracy
- How to choose an anchor point that makes the AR object more robust, easy to reloc
Select your checkpoints, e.g. one or more buildings
- Decide the place, where the user will have the AR experience. (e.g., a specific room or building)
Choose a time slot for playing, e.g. time (day time or night … etc), season (spring, summer, fall, or winter)
Decide the time of day (daytime, nighttime), season (spring, summer, fall, winter), and play zone.
- Maps should be created according to the season and time of day you will play.
- In the current version, it is recommended to create different maps for day and night.
Decide the “play-zone“ in your game
When planning your map, choose locations that are not changing.
Before creating the map, observe the environment to make a scanning plan.
- Choose an environment that is suitable for the map above.
- Choose a place and time with few people and cars.
- Simulate how you will move during scanning.
Start scanning
Scan buildings, furniture, store signs, etc., focusing on areas that are least likely to change.
When you start mapping, point the camera at the target environment and start.
Do not stop while scanning, but always move at a speed of 0.2 ~ 0.5 meter per second.
- Take pictures of the entire area you want to scan as you move.
- Do not walk too fast and be careful not to lose your AR tracking.
The size of the map should be the minimum size needed for the AR experience to be stable.
- If the map is too small, the anchor may shift. Make sure to create a map that is at least 1 meter long x 1 meter wide x 1 meter deep.
When you finish scanning, try to finish at the point where you started scanning.
- If it is difficult to return to the starting point, please end the scan at the point you passed during the scan.
Bad Example
Good Example